Mac slow after a macOS update? What’s normal
A Mac can be slow for a while after a macOS update, because macOS has background work to do: Spotlight indexes your files again, which Apple says can take hours or even days. Keep your Mac on power and let it finish. If your Mac is still slow after that, check Activity Monitor for a busy app, update your apps, and check login items and free space.
Why is my Mac slow after an update?
After you install a software update or upgrade, Spotlight indexes your Mac again, so search can find your files, mail and other data. Apple says indexing also happens when you first set up a Mac and as your data changes. This work runs in the background. Apple lists Spotlight indexing after you move your data to a new Mac among the heavy tasks that make the fans speed up, and says fan noise during work like this is normal.
How long does a Mac stay slow after an update?
Until macOS’s background work is done. Apple says Spotlight indexing can take hours or even days, depending on how much data is on your Mac. Later updates to the index are much faster. Indexing finishes sooner when your Mac is:
- not in use;
- connected to power;
- connected to the internet over Wi-Fi or Ethernet, so mail and other data can download to be indexed.
To see whether it’s still running:
- Press Command–Space bar to open Spotlight.
- Look at the top of the Spotlight window. While indexing is still running, an indexing progress indicator shows there.
The simplest fix is time: plug in your Mac and leave it be while you take a break.
Is it the update, or one of your apps?
Activity Monitor shows whether one of your apps or macOS itself is doing the work.
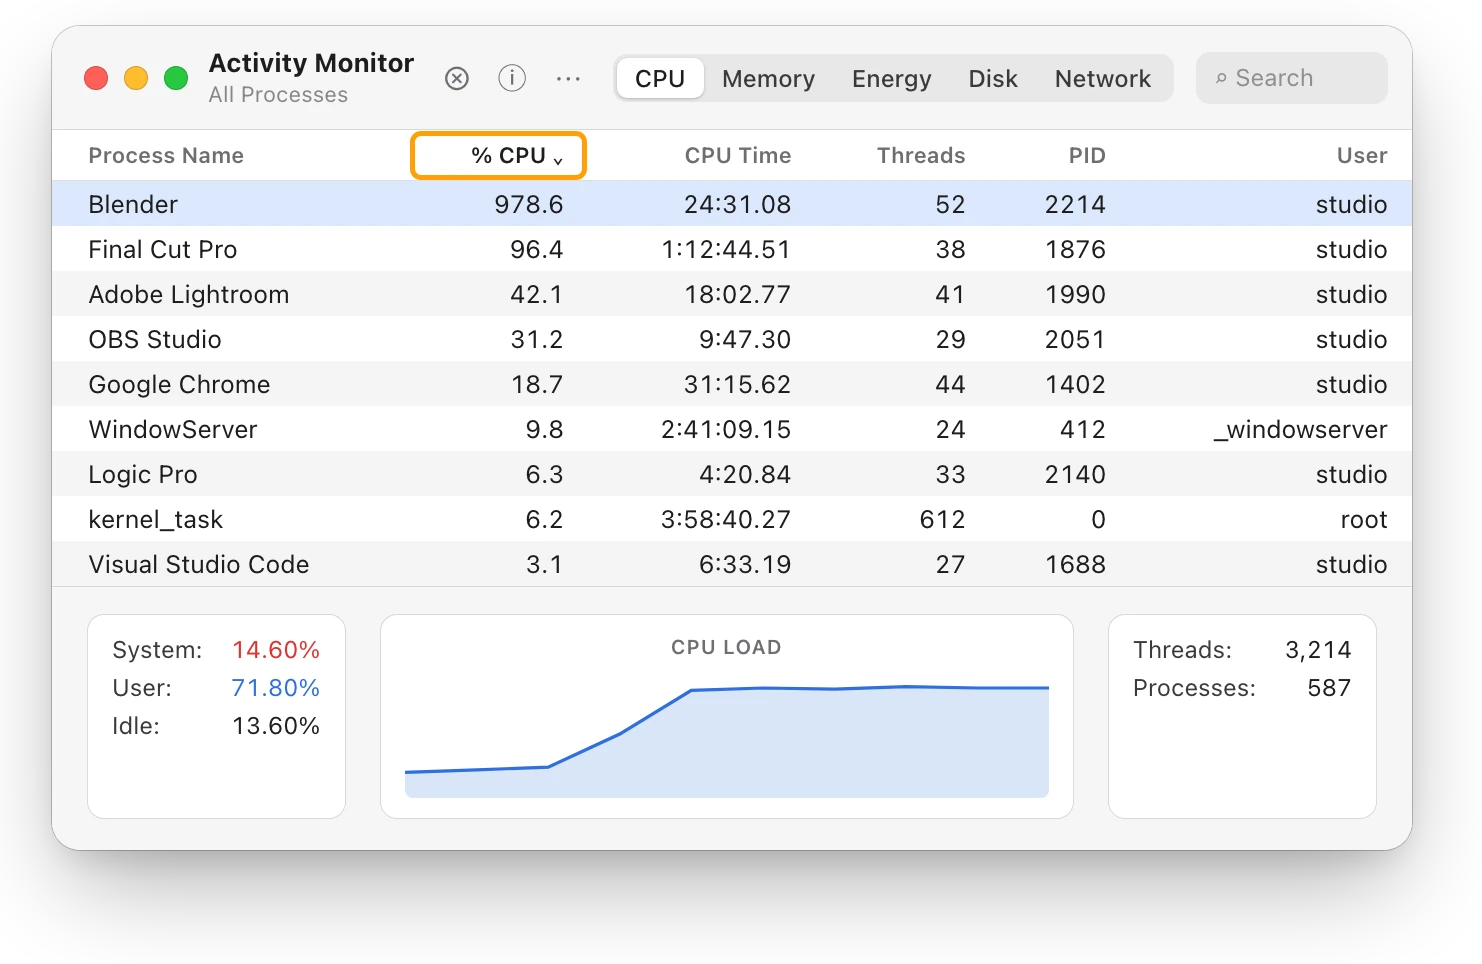
- Open Activity Monitor: press Command–Space bar, type Activity Monitor, then press Return.
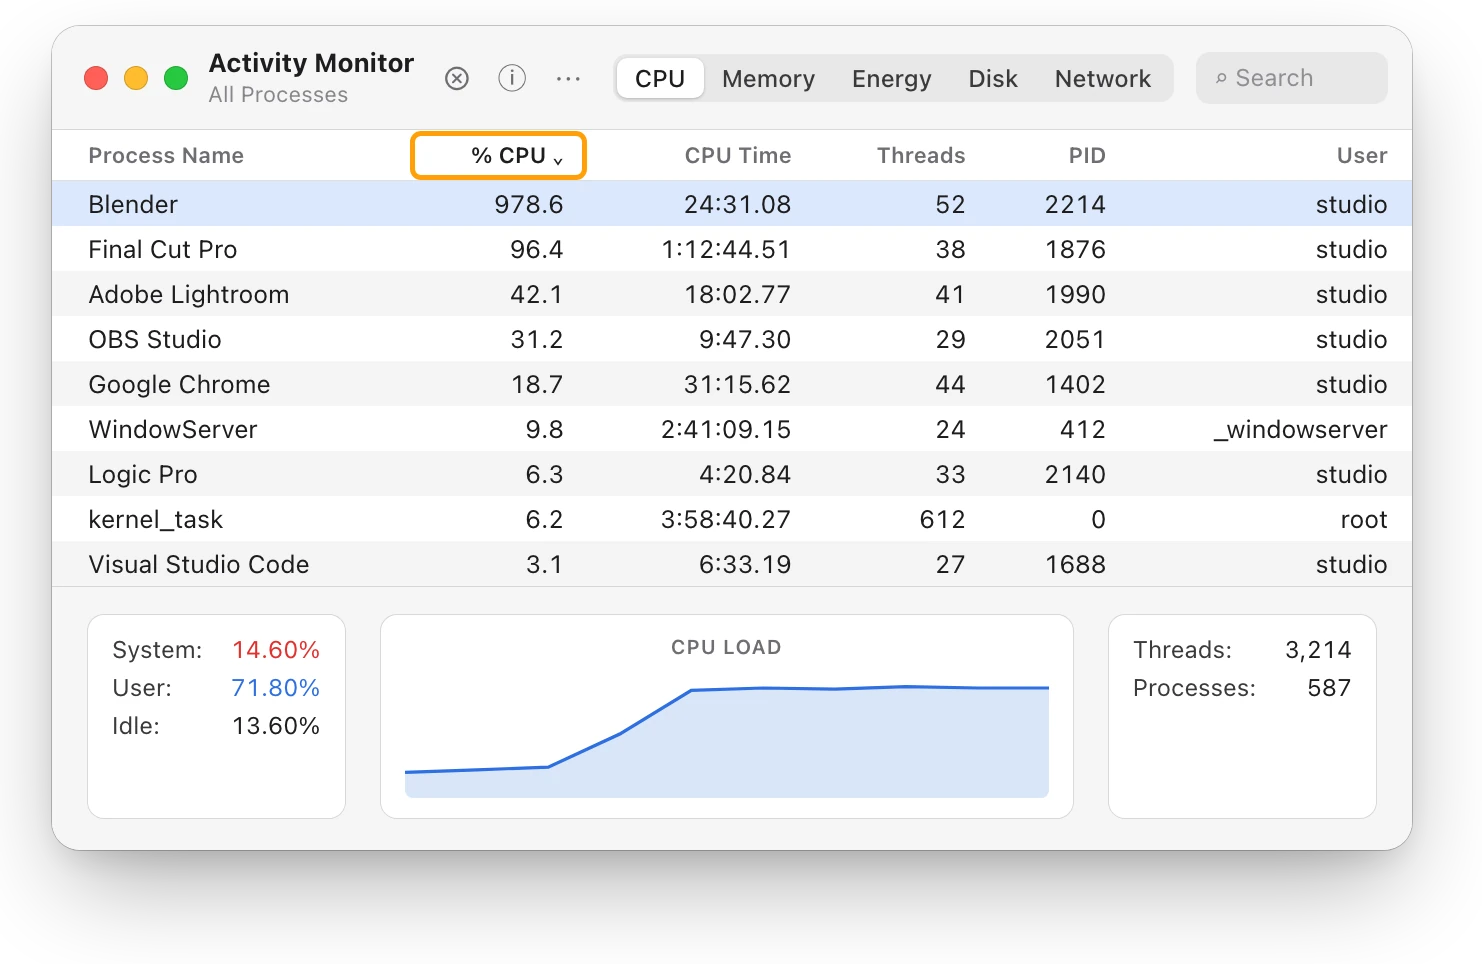
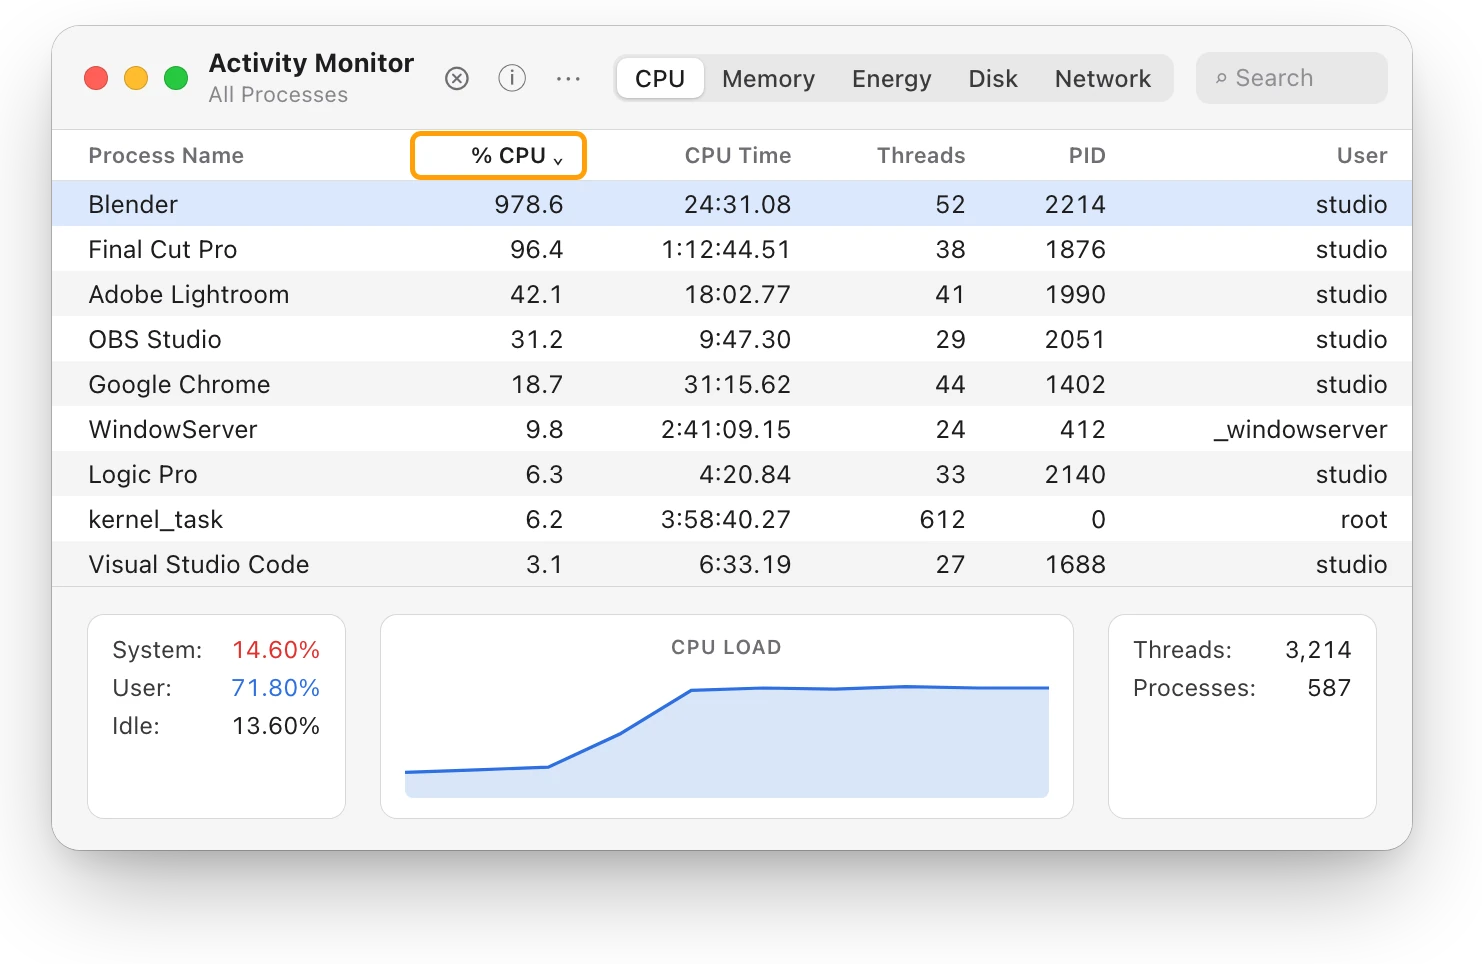
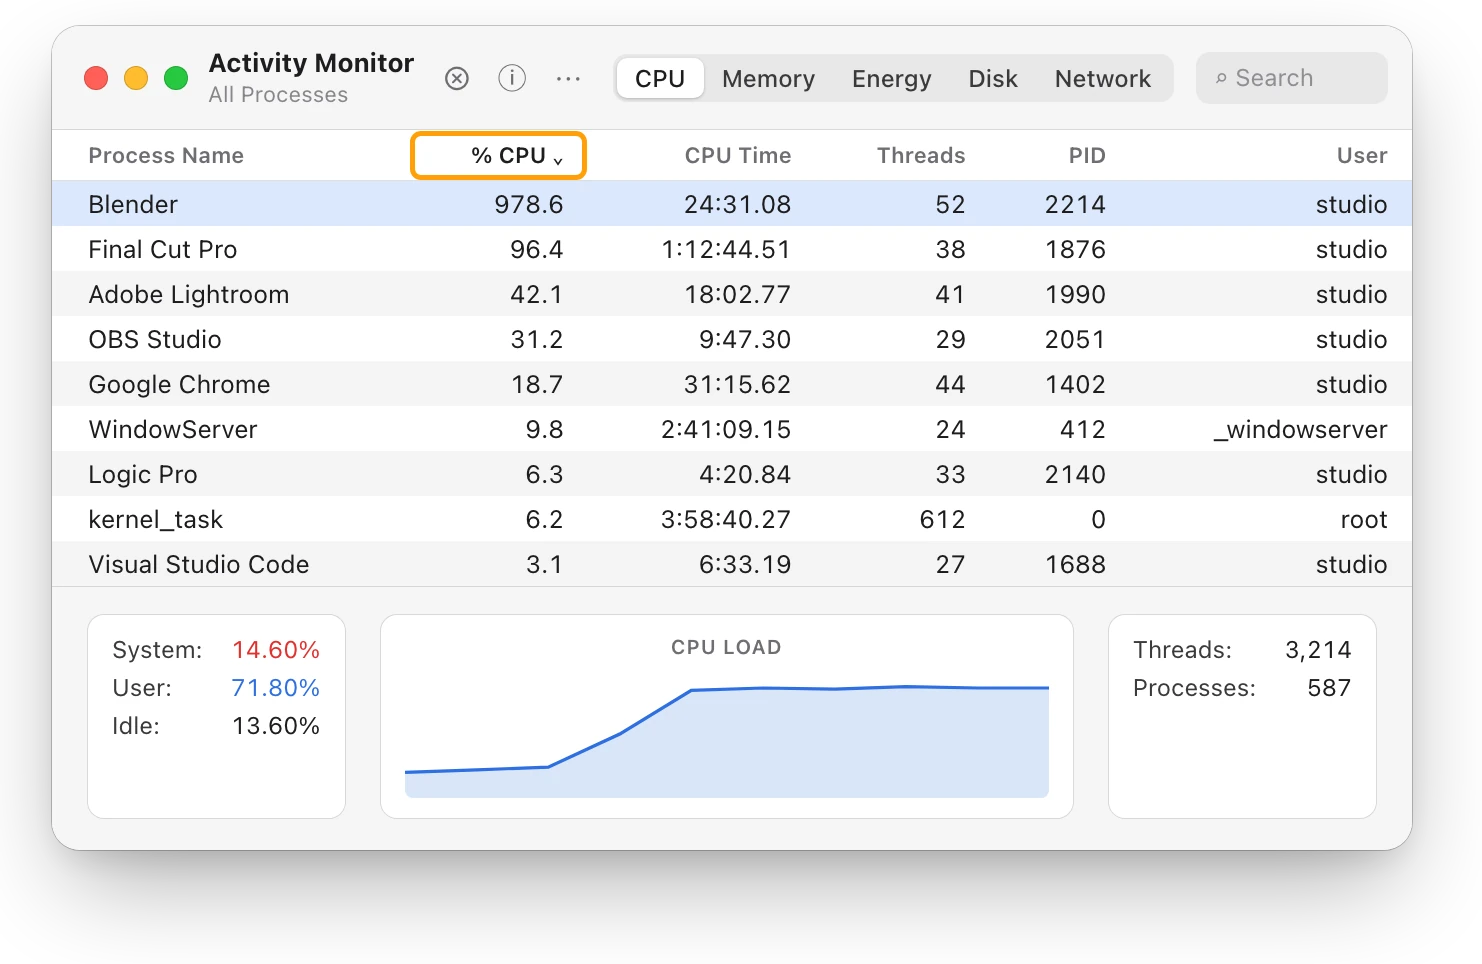
- Click CPU, then click the % CPU column heading to sort the list, busiest first.
- Watch the top of the list for a minute. An app that stays there for minutes, not seconds, is doing sustained work.
- Read System and User at the bottom of the window. Apple defines System as the share of the processor used by processes that belong to macOS, and User as the share used by apps you opened and the processes they opened.
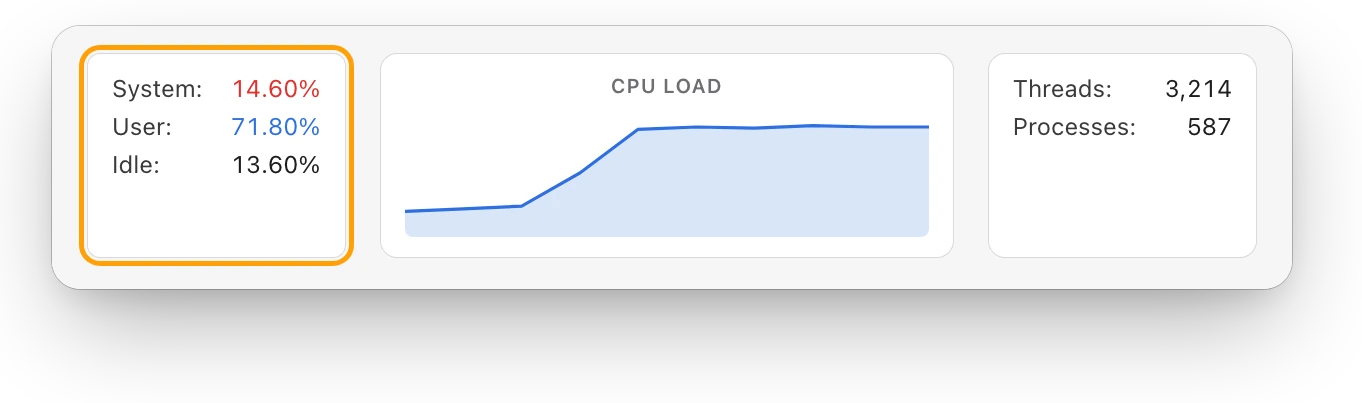
Here is how to read the two:
| What you see | What it points to | What to do |
|---|---|---|
| One of your apps at the top, User high | That app | Let its work finish, or save and quit it |
| System high, none of your apps near the top | macOS’s own background work | Keep your Mac on power and give it time |
| Idle high, but your Mac still feels slow | Not the processor | Check memory pressure and free space |
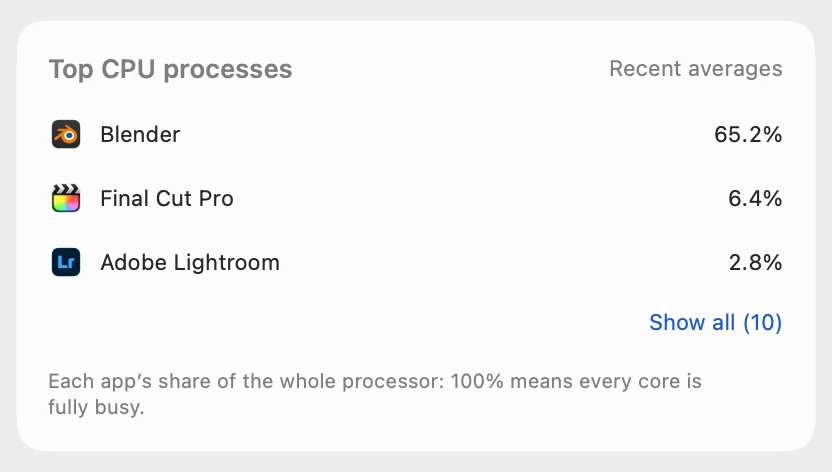
Activity Monitor counts each processor core as 100%, so Blender’s 978.6% keeps almost ten of this Mac’s 15 cores busy. How to check CPU usage on a Mac explains every number on that tab.
Do my apps need updating?
Check for app updates after a macOS update.
- Open the App Store.
- Click Updates in the sidebar.
- Click Update beside each app, or click Update All.
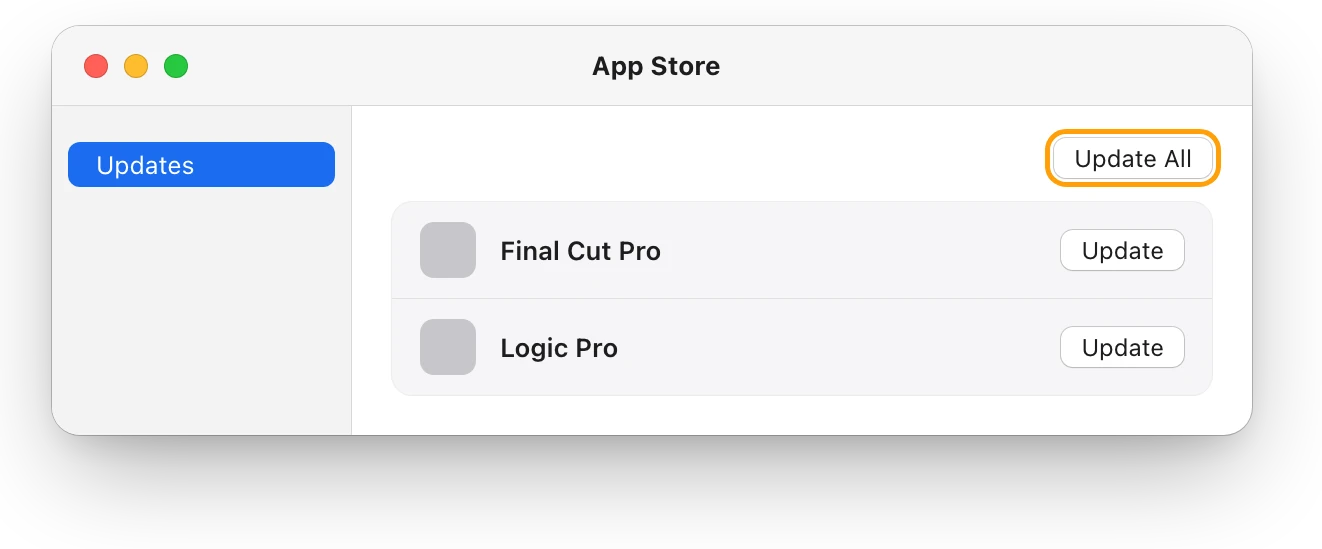
To have apps update on their own, choose App Store > Settings, then select Automatic Updates. For apps from outside the App Store, check with each app’s developer. Apple also suggests quitting any app that isn’t compatible with your Mac, such as one that needs a different processor or graphics card. To see whether another macOS update is waiting, choose Apple menu > System Settings, click General, then click Software Update.
Are login items slowing it down?
Apps that open at login start every time you log in, and some keep working in the background.
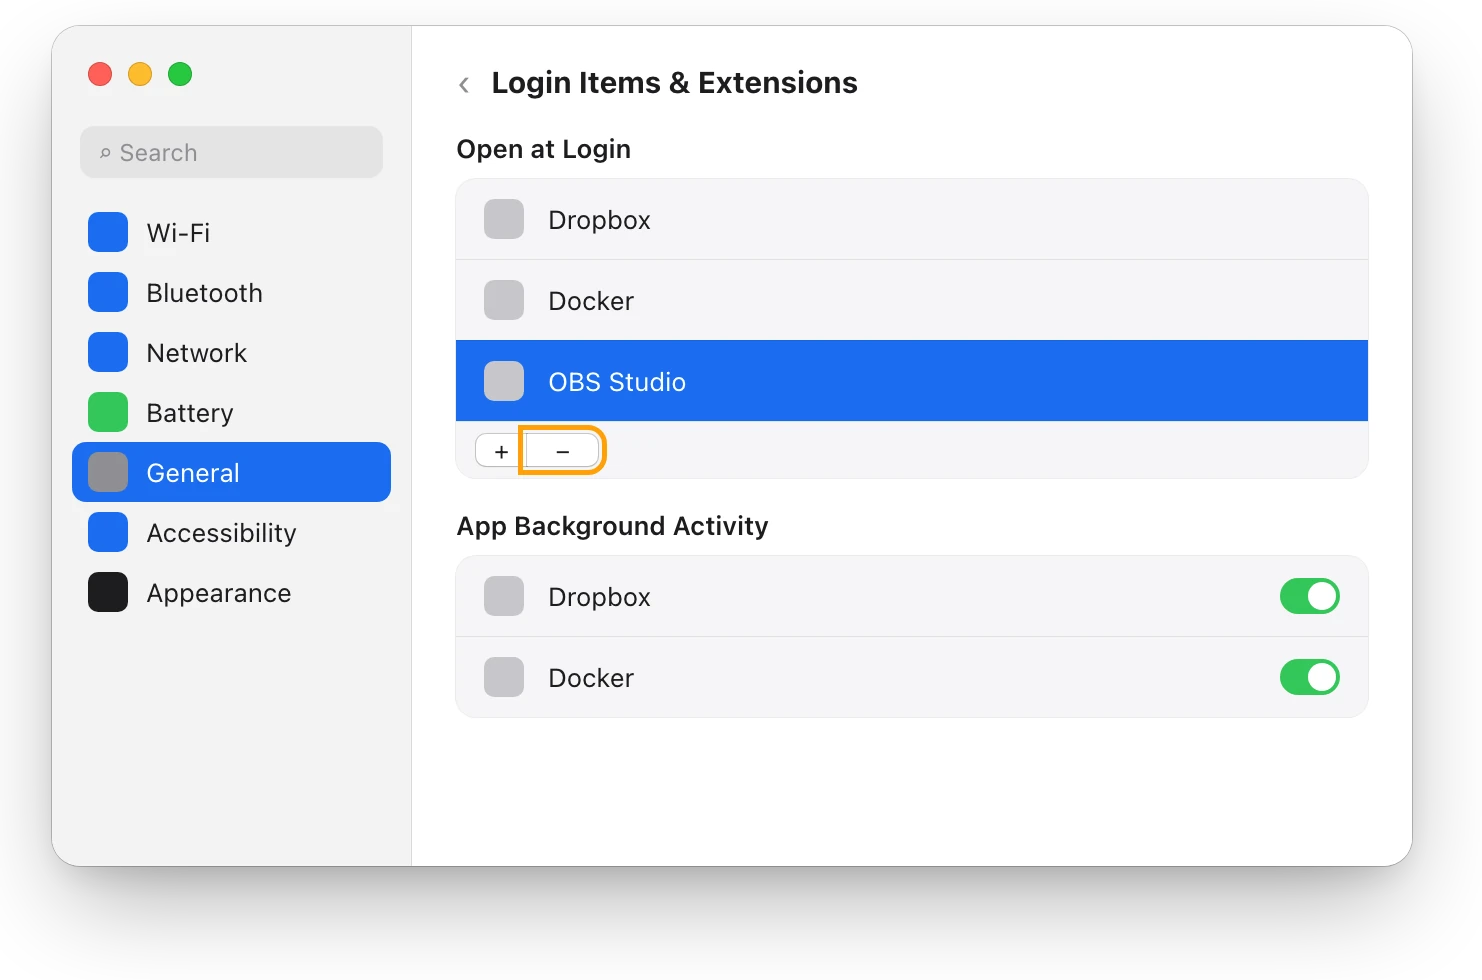
- Choose Apple menu > System Settings, click General, then click Login Items & Extensions.
- Under Open at Login, select an app you don’t need at login.
- Click the Remove button (−).
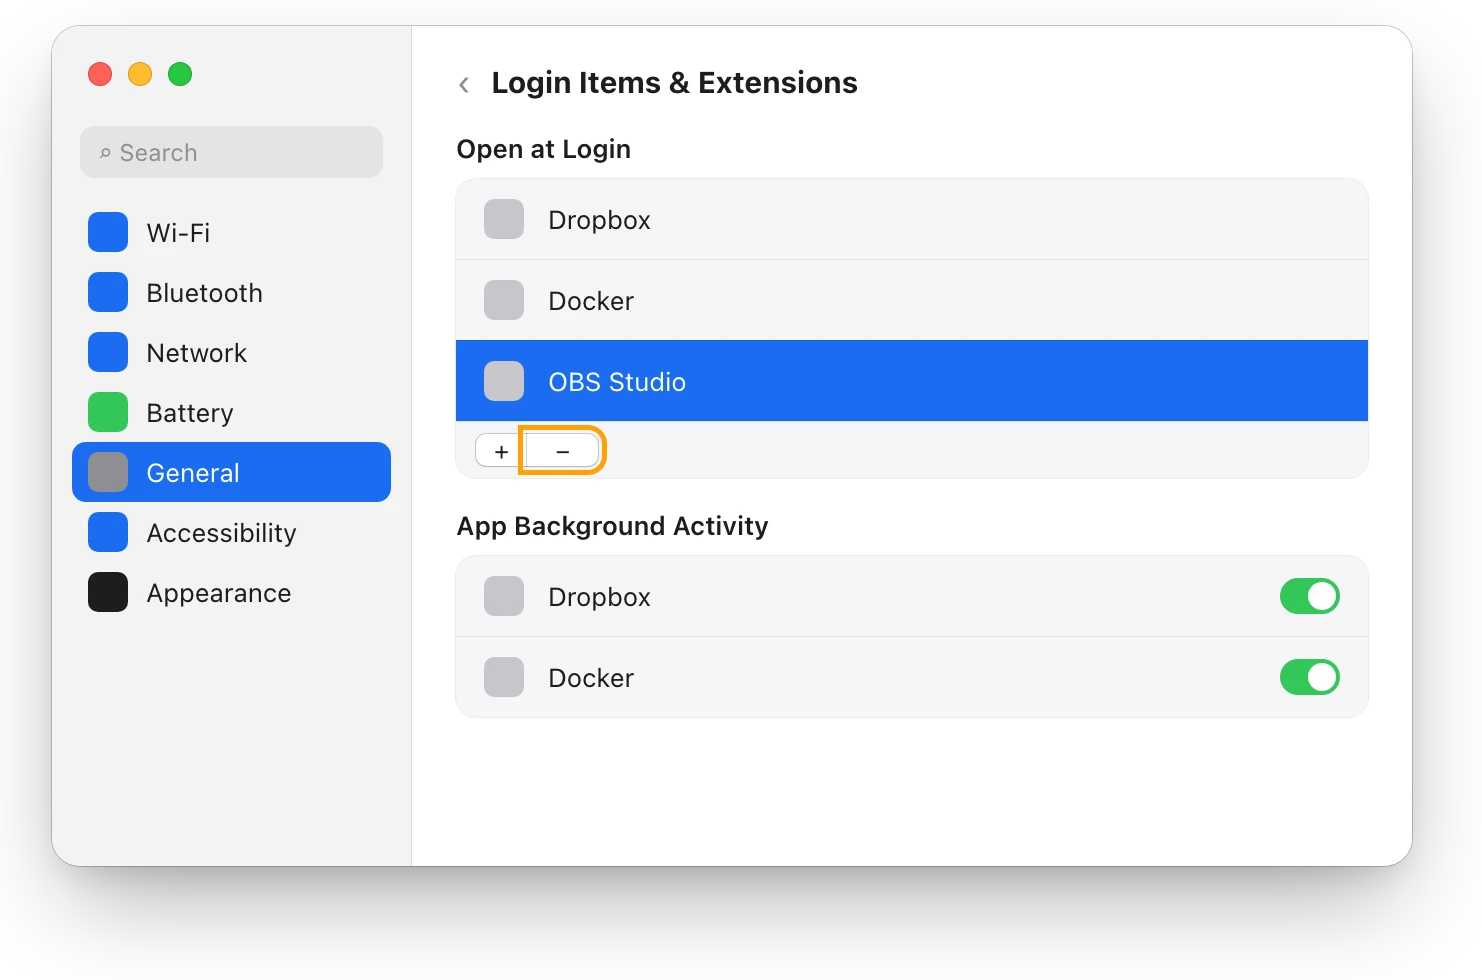
How to stop apps opening at startup on a Mac covers the background items too.
Is there enough free space?
A startup disk without enough free space can slow a Mac down, and installing a macOS update needs room of its own.
- Choose Apple menu > System Settings, click General in the sidebar, then click Storage.
- Read the line at the top: how much of the disk is used.
- If it’s nearly full, try the recommendations, move large files you want to keep to an external drive, and empty the Trash.
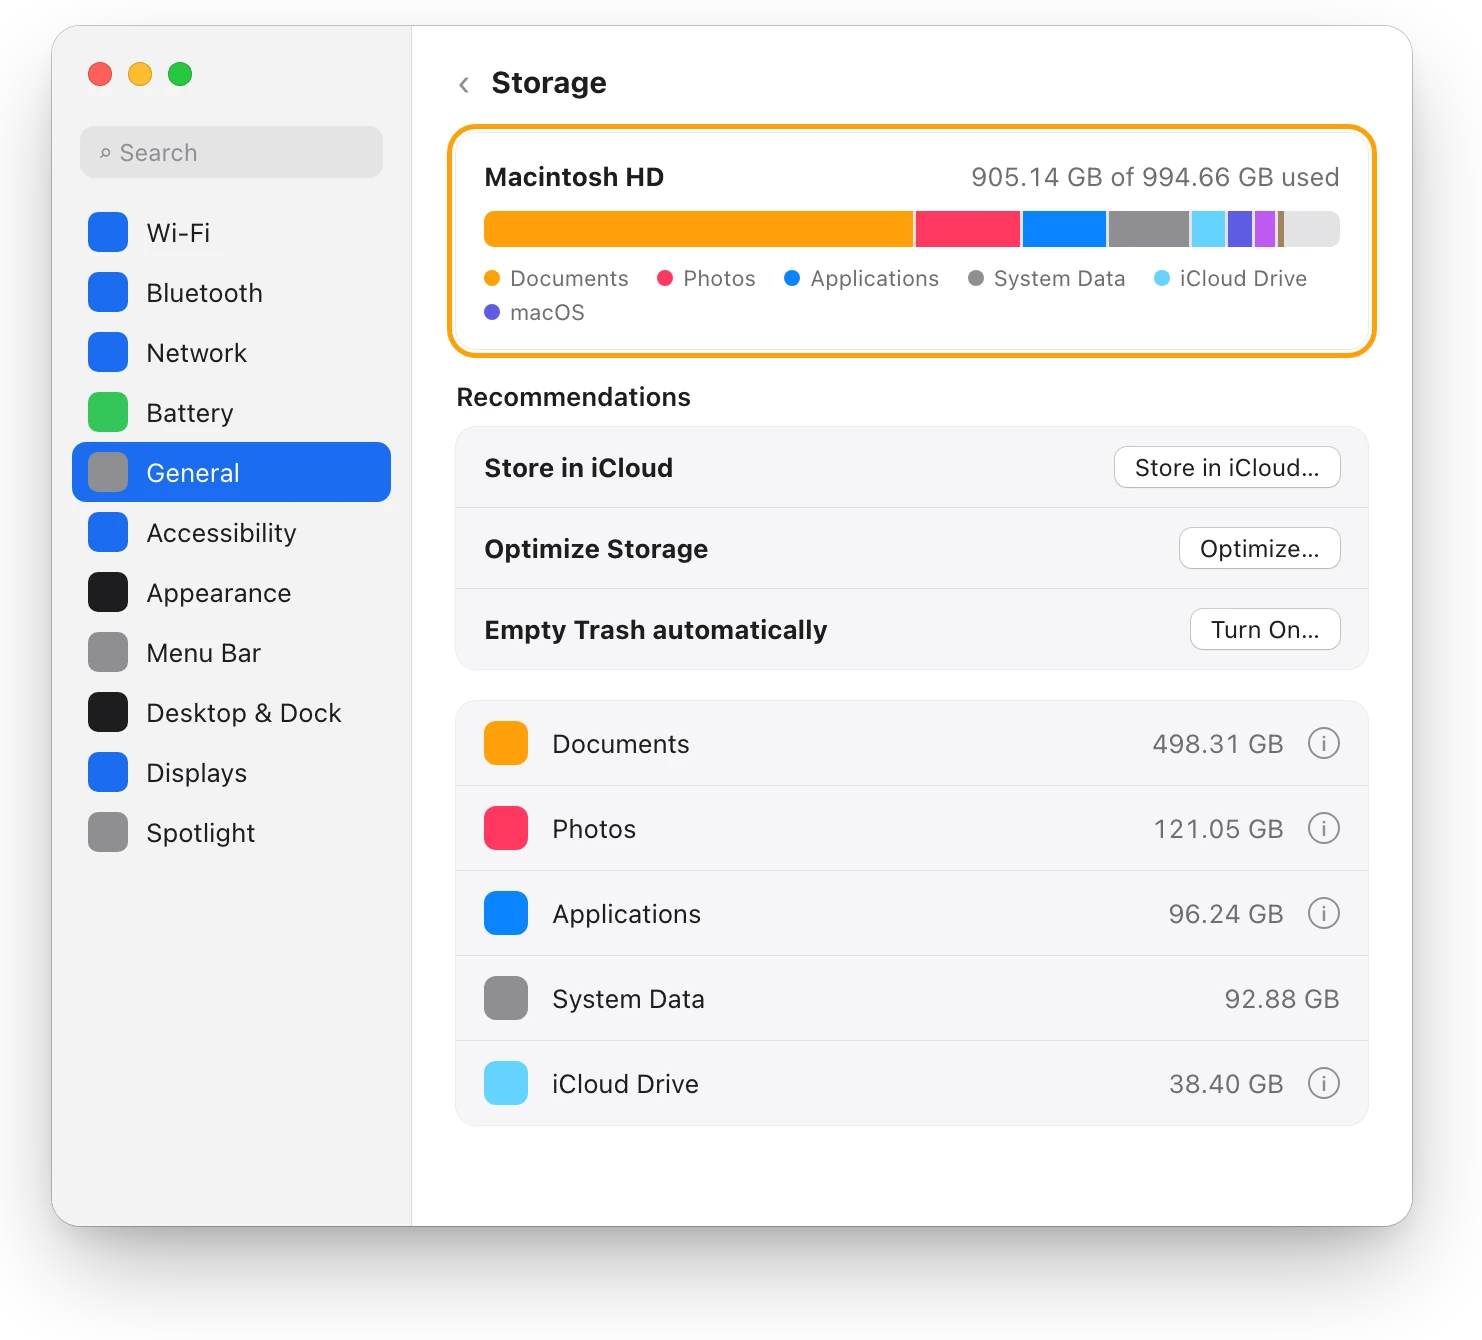
If an update won’t install for lack of space, Apple says starting up in safe mode might free enough room, for a while, to finish it.
Does restarting or safe mode help?
Restarting closes every app and starts fresh: choose Apple menu > Restart. Safe mode goes further. It starts your Mac without login items, extensions that macOS doesn’t need and fonts that macOS didn’t install, checks the startup disk and clears some system caches.
- Apple silicon: shut down, then press and hold the power button until you see “Loading startup options” or the Options icon. Select your startup disk, then hold Shift and click Continue in Safe Mode.
- Intel: turn on your Mac and immediately press and hold Shift until the login window appears.
If your Mac is fine in safe mode but slow again after a normal restart, Apple says a login item or other software that safe mode blocks is the likely cause. Spinning wheel on Mac? What it means and what to do covers safe mode and Apple Diagnostics in more detail. If your Mac is still slow once the update has settled, How to speed up a Mac: what actually helps ranks every fix.
Questions people also ask
Why is my fan loud after a macOS update?
Heavy processor work speeds up the fans, and Apple names Spotlight indexing after moving data to a new Mac as one such task. If the fans stay loud for days, check Activity Monitor for an app at the top of the CPU list.
Can I use my Mac while it indexes?
You can, but Apple says indexing finishes faster when your Mac isn’t in use.
Does every Mac do this after an update?
Yes. Apple says Spotlight indexes after you install a software update or upgrade, and how long it takes depends on how much data is on the device.
Scope for Mac · Free, coming to the Mac App Store
How Scope helps
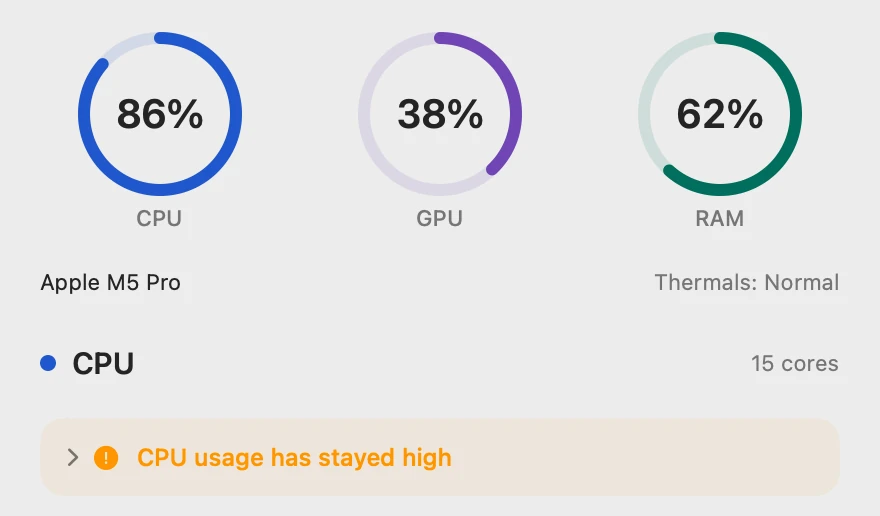
Scope is a free Mac menu bar app that shows how busy your Mac’s processor is, beside the apps using it and the last minutes of CPU history. After an update, that tells you whether one of your apps is behind the slowdown or macOS’s own work is.
In your menu bar
Scope Free keeps one whole menu bar item of your choice, so the CPU figure stays in view while macOS catches up.

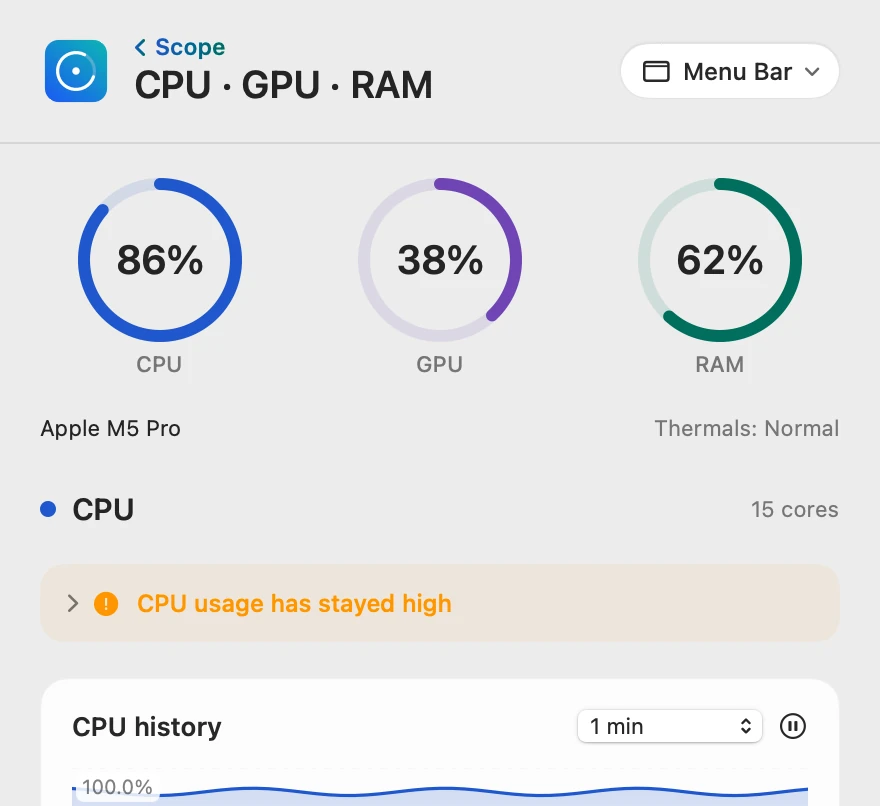
Your app, or macOS?
Scope shows each app’s share of the whole processor, so Blender’s 978.6% in Activity Monitor is 978.6 ÷ 15 = 65.2% here. Scope’s lists hold the apps and processes you run; macOS’s background processes run in other accounts, so they aren’t listed. When Scope’s CPU stays high while Top CPU processes shows little, that points to macOS’s own work.
Lasting, or easing off
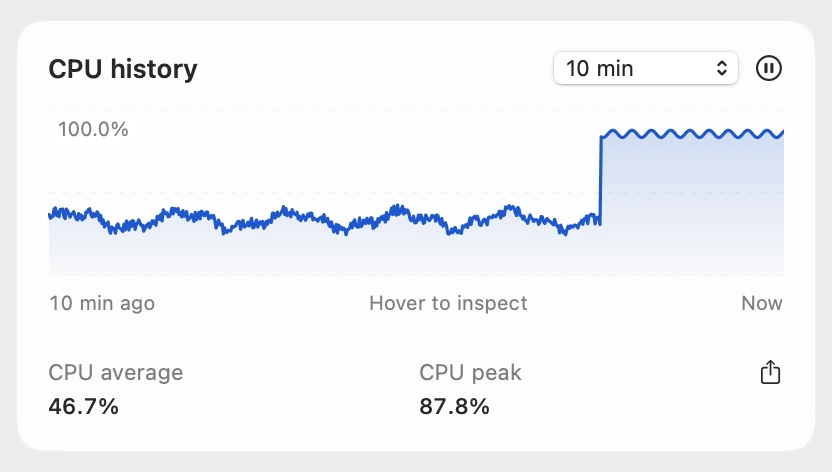
CPU history shows the last 1, 5 or 10 minutes, so you can see whether the load keeps going or eases off. Scope Pro keeps 24 hours, so the hours after an update stay on the chart.
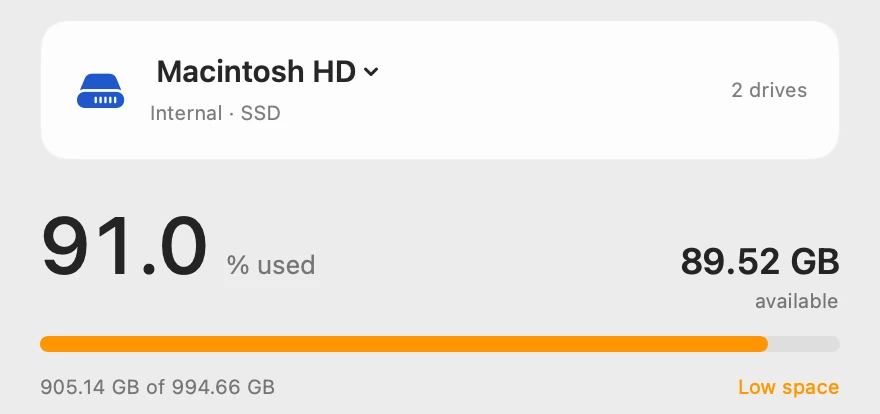
Room on the disk
Drive shows how much room is left, in percent and gigabytes, the same disk Storage shows. Scope Free shows an alert on its overview when a drive stays past its limit; Scope Pro also names the file behind it.
Scope shows and explains. It never quits apps, installs updates or changes settings, so what to do stays your call.
Try it here
The real Scope, working, right in this page.
Click any item in the menu bar, or a card inside, as you would on your Mac.
Scope Pro Every menu bar item is shown here. Scope Free keeps one whole item of your choice, with every reading inside.
See what your own Mac is busy with.
Keep reading
Guide · Slow Mac
Why is my Mac slow? How to find the cause
A slow Mac is usually a busy app, too little memory, a nearly full disk or heat. Here’s how to see which one with macOS’s own tools.
Slow Mac
How to speed up a Mac: what actually helps
Speed up a Mac by fixing the real cause: quit the busy app, free memory or disk space, keep it cool, trim login items. What helps most, and what doesn’t.
Slow Mac
How to stop apps opening at startup on a Mac
Stop apps opening at startup in System Settings > General > Login Items & Extensions: select the app and click Remove. Background items and windows too.
Slow Mac
How to check CPU usage on a Mac
Check CPU usage on a Mac in Activity Monitor’s CPU tab. Here’s what % CPU, System, User and Idle mean, why a process can pass 100%, and other ways to look.
Slow Mac
Spinning wheel on Mac? What it means and what to do
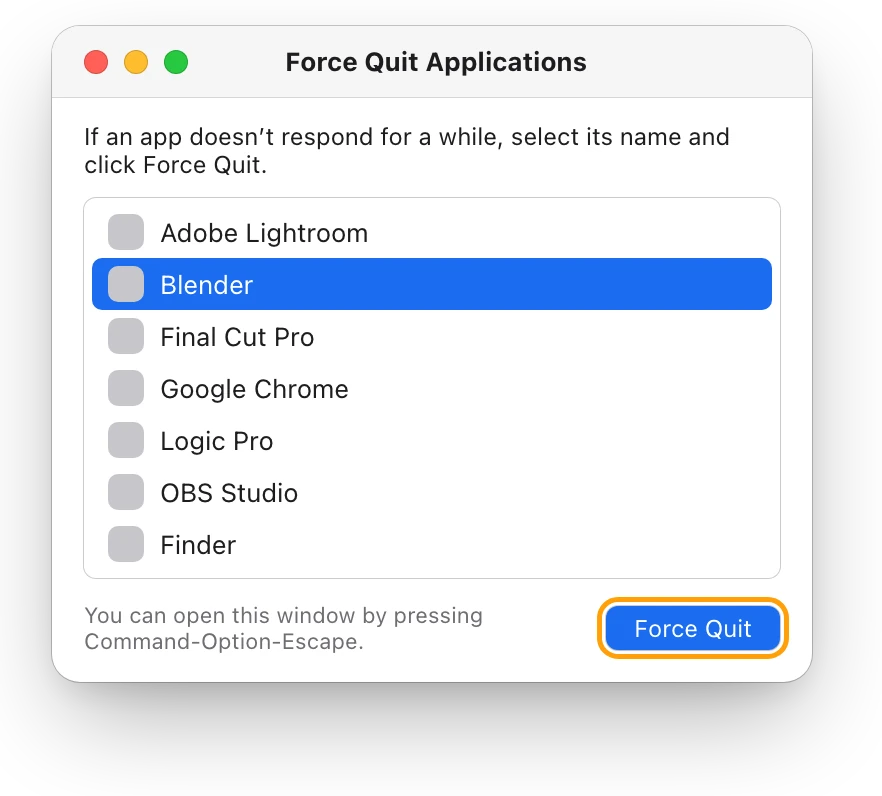
The spinning wheel means an app is busy. Wait, then force quit it with Option-Command-Esc. If every app spins, Activity Monitor shows why.
Sources
- Apple Support: About Spotlight indexing and search results on Apple devices
- Apple Support: About fans and fan noise in your Apple product
- Apple Support: View CPU activity in Activity Monitor on Mac
- Apple Support: View information about Mac processes in Activity Monitor
- Apple Support: If your Mac runs slowly
- Apple Support: Use the App Store to update apps on Mac
- Apple Support: How to manually update apps from the App Store
- Apple Support: Keep your Mac up to date
- Apple Support: Open items automatically when you log in on Mac
- Apple Support: Free up storage space on Mac
- Apple Support: Shut down or restart your Mac
- Apple Support: Start up your Mac in safe mode
Last checked October 19, 2026. Readings, apps and files in the pictures are from a made-up Mac.